
How to Preach With an iPad
When Steve Jobs first announced the very first iPad back in 2010, I remember watching that keynote and saying, “Man, that would make a great tool for preaching!”
I didn’t get one right away because they were kind of expensive, but I managed to save up some money. After a couple of years, in 2012, I got my first iPad and began to use it in ministry every single day. And I loved it.
It has been a great tool for me and for my ministry. And ever since then, I’ve been using my iPad for preaching.
My current iPad is an old iPad Air 2. I got it about four years ago, and it has held up and been a faithful workhorse ever since.
So if you’re a manuscript or an outline preacher, here’s how you can use the iPad for your preaching too.
Format Your Notes for Your iPad
If you’ve been following me for a while, you know that I’m not a big fan of using an entire manuscript for preaching. I write a manuscript to prepare the sermon, but I like to use as few notes as possible when preaching.
I try to stick to a one-page outline just so I can read direct quotes, statistics, main points, and look down and know exactly where I need to go next if I lose my place or if I get off track.
However, I know that everybody has different styles. Everybody has their own way of doing things.
The first thing you need to do is to format your sermon notes properly to fit and work best on your iPad.
Writing App
I like to use Apple’s Pages app (and here are the other iPad apps I use). It’s free. You can download it on any Apple device.
It’s fairly powerful, doing just about anything Microsoft Word can do, which is plenty enough power for writing a sermon.
And it’s pretty easy to use. If you’ve ever used Word or Google Docs, you’ll understand how to use Pages.
Document Layout
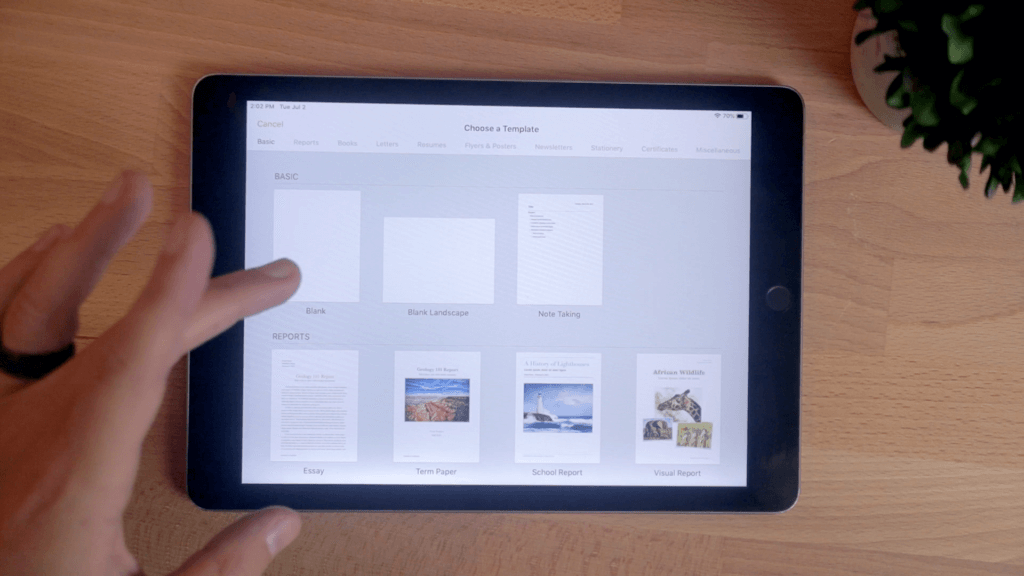
So the first thing I do is open up a new document in Pages. A lot of the time, I’ll have my sermon already written on my computer, and I’ll just copy and paste that document into my notes and cut it down.
But if I’m starting a new document from scratch. I’ll begin a landscape document for my notes because I like having my iPad in landscape (horizontal orientation) on the podium, not in portrait (vertical orientation).
I use landscape mode so that I can see one page of notes with two columns.
To make two columns, just click on the paintbrush icon, hit columns, and bump it from one to two.
Here’s an example from sermon I preached a long time ago.
Margin and Font Size
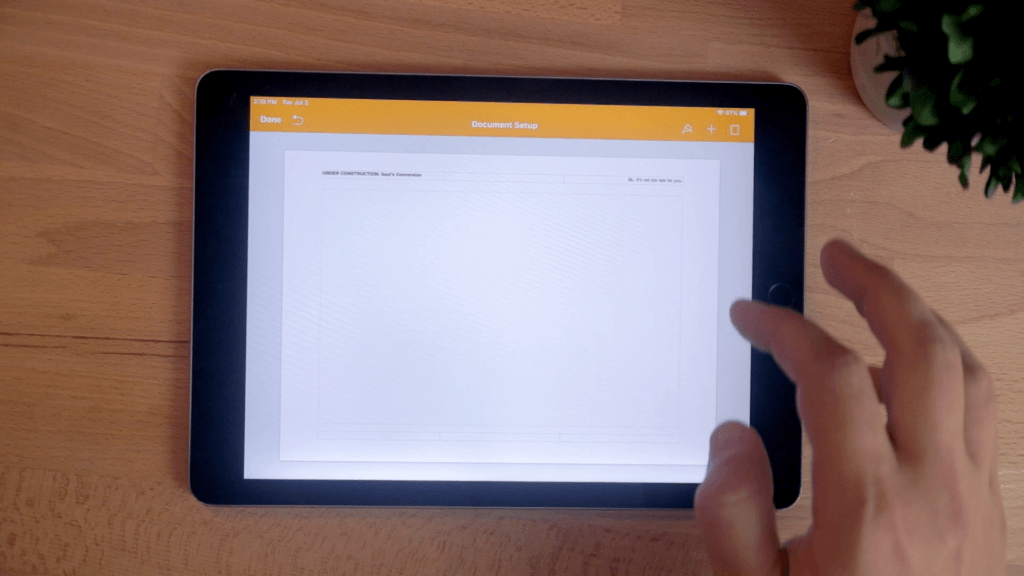
I also like to widen the margins on the page (the extra white space on the edges). You can do this by going into the document settings by clicking the three dots in the upper-right corner, clicking document set up, and I then make my margins even wider. This just gives me room to fit more on the page if I need it.
You can go almost all the way to the edge if you want. I like to put it at about .5 inches on each side. But set it up however you like it.
With a smaller font and wider margin, I can fit a lot of text onto one page if I need it. That might be a little small for you, and you can increase the font size or number of pages if you’d like. I’m sure as I get older and my eyes get worse, I’ll need a larger font and probably more pages. But for now, when I’m on stage, this works for me.
So look at your document and format it however you like. Make it look exactly how you would like it on the screen.
Exporting
Once you have your sermon notes ready, there are few different options for how to export it.
Presenter Mode
A little-known feature in Pages is that if you click on the three dots in the upper-right corner, you can see a setting called “Presenter Mode.”
When you tap that, it basically turns your sermon notes into a teleprompter view. And you can even turn on autoscrolling, and adjust the speed of how fast you want it to go. So you could set it up, stand back, and just read your message as it plays, and you can adjust it up or down with your finger at any time.
Now, I don’t necessarily recommend that for preaching, but if you read your manuscript that might be something to look into. It’s a cool little feature that a lot of people don’t know about.
Pdf File
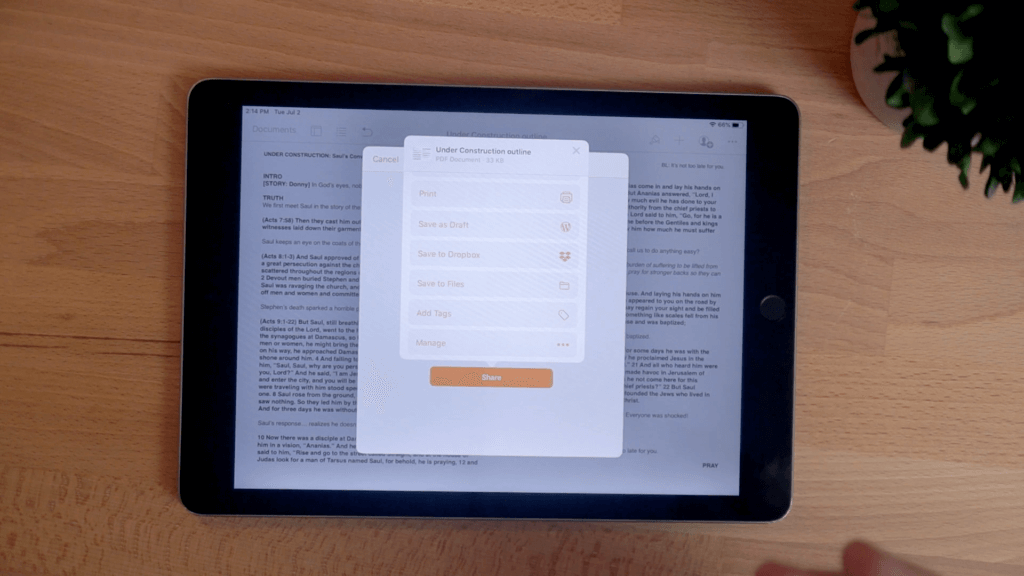
I prefer to export my document to a PDF file. You could leave it in Pages and preach from that if you want to, but what if you accidentally hit the wrong button?
One wrong tap and all you could suddenly bring up the keyboard that covers half of the page and you can’t see your notes. Even worse, you could delete or write over something important.
You really don’t want the risk of leaving your notes in an editable format.
All you have to do is click the three dots again, and tap “Export,” and you can export your notes to a PDF file. A PDF is essentially a document where you can’t edit the text. You could write notes over it in some software, but the text is permanent.
In the new iPadOS, you can actually save it to your files directly on your iPad, which I think is a great way to do it.
Some people like to save it to iBooks, the Kindle app, the basic Notes app, or dedicated PDF reader app like Good Reader. Good Reader gives you more options, but it costs a little more too.
With the new features in iPadOS, you can just save it to a folder in Files. I just created a new one titled “Preaching.”
Then if you open the files app, you notes are saved right there. You can open the PDF directly in the Files app, and even mark it up with highlights or anything else if you want to.
You might feel like you’re done, but hang on. You’re not done yet. There are a few last things you have to do to avoid disaster.
WARNING: Your iPad Sermon Could Self-Destruct Without These Safety Measures
If I were to leave my iPad as is and try to preach from another app just like this, I’d be heading for trouble.
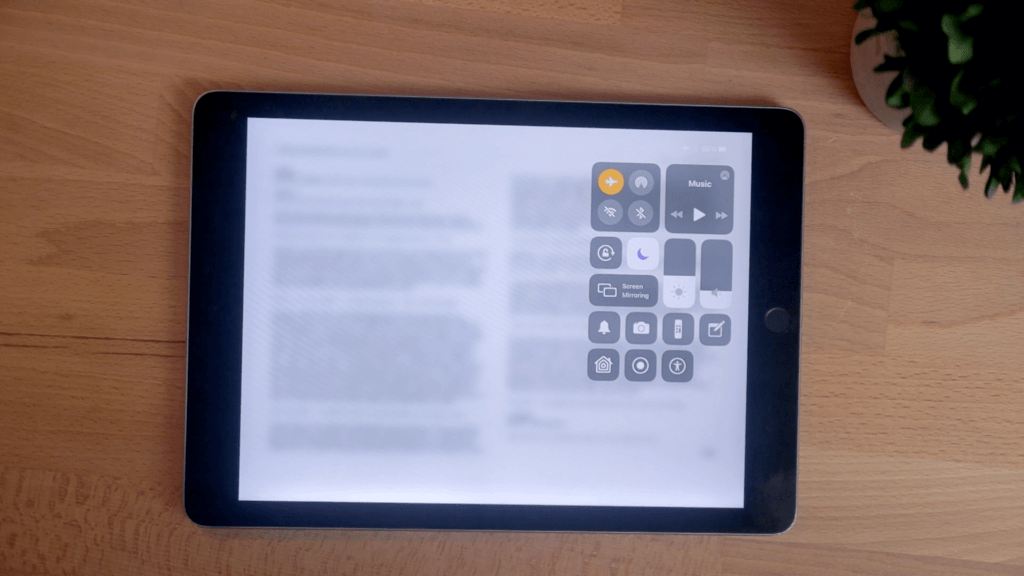
Airplane Mode

First, you need to make sure to turn on airplane modes.
If you swipe down on the iPad from the top right corner, you bring up this control menu. And all you have to do is the button that looks like an airplane.
Now you’re in airplane mode.
Airplane mode shuts off all of your Wifi, if you have a cellular connection on your iPad, it stops that off, and if also turns off Bluetooth.
Iit shuts all of this down so that your iPad won’t send or receive any outside signals. So nothing from the internet can interrupt the flow of what you’re doing.
You don’t want a bunch of notifications popping up, or your mom trying to call you on Facetime in the middle of your sermon. Now, that would be funny, but highly embarrassing and distracting.
You don’t want anything that could be a distraction popping up. So make sure you turn on airplane mode.
Airplane mode will help with that, but it won’t stop everything.
Do Not Disturb Mode
You also have to turn on the do not disturb button, which is this one below the airplane that looks like a moon.
Always hit that moon button, because it makes everything on your iPad silenced so no sounds or notifications pop up to disturbs you.
BE WARNED: Do not disturb mode with the moon burrow by default is only in effect when the iPad screen is locked (turned off).
It won’t do you any good when you’re using it. So you have to go into your settings, click on do not disturb, and look under where it says “silence.”
By default it will be set to “While iPad is Locked.” That’s not what you want. Instead, check the “Always” option.
Now when do not disturb mode is on, even when you’re using your iPad, you’re not getting notifications or other things interrupting you.
Make sure to change that setting!
Turn Off Auto-Lock
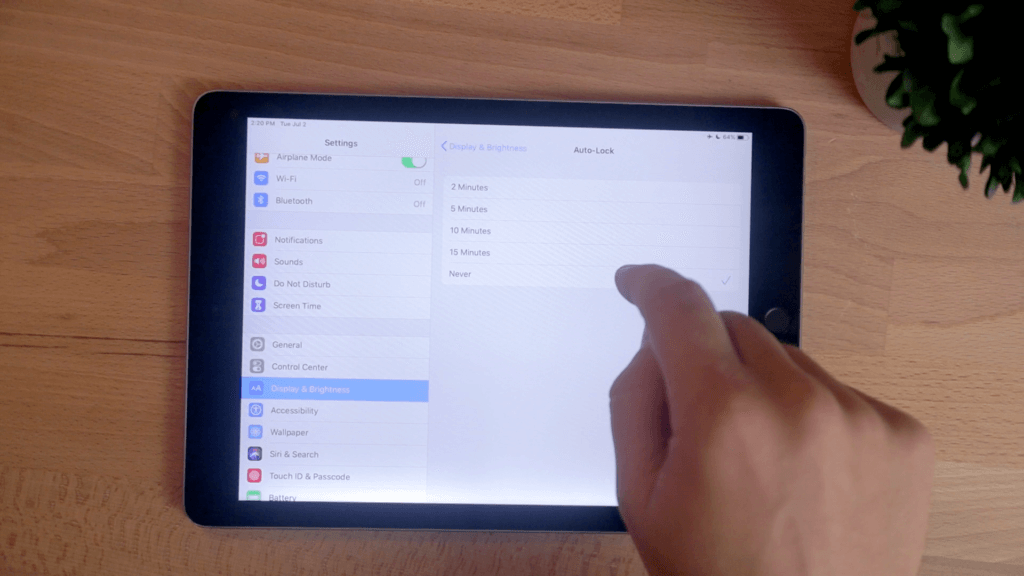
You may feel safe, but there’s a still a ticking time bomb waiting to ruin your sermon called auto-lock.
Auto-lock is the default timer that automatically turns off the screen of your iPad after it hasn’t been touched for a certain amount of time.
When you’re preaching for 30, 45, 60 minutes, or however long you preach, you don’t want your notes shutting off on you.
Your screen needs to stay on, even if you never touch it.
You need to go into your settings again and open the “Display & Brightness” options. Then tap Auto-Lock and set it to Never.
You never want your iPad to automatically lock on you while preaching. So turn this off and leave it off so you don’t forget it.
Rotation Lock
With that done, you’ve avoided most potential disasters, but there are still a few more options that you might want to consider.
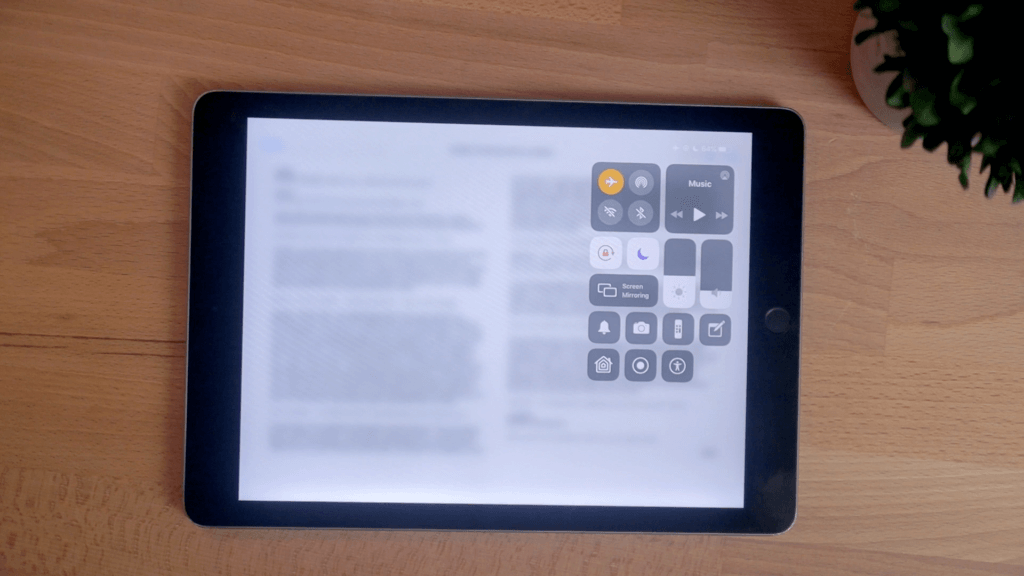
Go back into the control panel (swiping down from the top right corner of the screen) and tap the button with the lock on it. This turns on rotation lock to lock your iPad’s screen from rotating when you move it.
Everything’s going to stay put just like if you were holding and rotating a piece of paper.
You may not move your iPad. It may just sit on a table. But I’ve had times where I set my iPad at a different angle, or I bump it, and the screen flips. Suddenly my notes go sideways and my preaching gets sideways with it.
So turn on the rotation lock. You don’t want to mess with that.
Brightness and Dark Mode
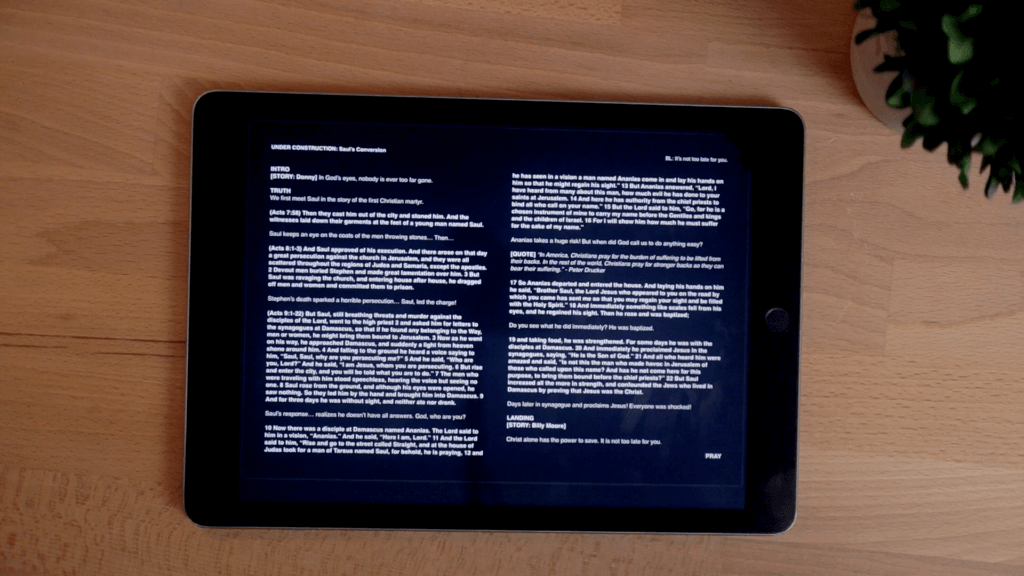
The last thing that you want to think about is the brightness of your screen.
An iPad’s screen can be really bright on a dark stage with the white background of your notes.
So check out the stage before you preach and turn the brightness as low as you can so that you can still read your notes but you aren’t lighting up the stage.
My favorite trick is to invert the colors of the screen to almost create your own dark mode.
Go into the settings again, tap “Accessibility,” and scroll down and hit Accessibility Shortcut. Now click on Classic Invert Colors.
You just set a shortcut to invert the screen colors whenever you triple-click the home button.
Now you can just triple-click the home button before you preach and suddenly your notes will be white text with a black background, emitting far less light.
This is good for a few reasons. One, a bright screen singing up at your face, makes it look like you’re trying to tell a scary story around a campfire. Unless you’re preaching about the horror of hell, you probably don’t want that look.
You’ll look intimidating and scary, and it’ll make everything around you glow.
Two, if you wear glasses like I do (when I don’t have contacts in), your glasses can catch a reflection from the screen, causing a distraction for people and also blocking your connection with your audience through good eye contact.
Go and Preach with an iPad
The whole point about using tools like an iPad when you’re preaching is to help add clarity to God’s message through you, not distract from it.
Anything you can do to eliminate distractions—turning off notifications, turning off sound, making sure no one can call you, and turning the brightness down—will really help.
So that’s how I set up my notes to to preach from my iPad. I hope that is helpful for you?
But I’m curious, are you an iPad or a good old-fashioned paper notes preacher?
And if you’ve used an iPad before, what tips have you learned?

Question: Which screen size would you recommend? Read your article when it was published, and prepping for a few outdoor services this month and next, I’m thinking now is the time to try this. No papers blowing away. 🙂 Thank you!
A wonderful tool indeed an ideal for professional preaching.
Thank you and bless you.
You’re welcome. Glad this could help.
I Brent using the iPad for a while. Great tool. I convert to pdf from pages and send to my binder, page to page. Incredible tools. 👍
Nice!
I Brent using the iPad for a while. Great tool. I convert to pdf from pages and send to my binder, page to page. Incredible tools. 👍
I’ve been using an iPad for a number years. Sermon is initially prepared in Pages on a MacBook Pro that is synced thru the cloud so a copy is on the iPad as well once complete. It is only synced through the cloud not stored only there. That way I don’t worry about having access to the cloud while preaching. No having to manually transfer that way. Then when preaching, turn Presenter Mode on (which prevents edits as well by the way) and go to it!
One other note, I also use a second iPad and Keynote for the presentation for the sermon (we’re a very small church so no A/V person).
That’s a great solution. I’ve often thought that I would use Keynote in a similar situation if I didn’t have a volunteer or a dedicated media computer to run a program like ProPresenter.
Been using the iPad for 4 years now. No troubles. Word to pdf to dropbox then open in ibooks. That way it stays page to page and want go to the next page on accident.
I’ve used iBooks for a lot of sermons, and I’m with you on using a PDF format to keep the page formatting. Using an ePub is nice if you want the option to adjust text size, but I’d rather set it up the way I want it in Pages and not mess with it.
Been using the iPad for 4 years now. No troubles. Word to pdf to dropbox then open in ibooks. That way it stays page to page and want go the next page on accident.
Great tips. I’ve been preaching with my iPad Pro for over two years. I know your preference for preaching is to use notes, but as you mentioned, the iPad is great for guys like me who preach my manuscript.
For those that do – I have to recommend an app called PromptSmart Pro. It’s a teleprompter app with typical scrolling features like you mentioned with Pages. BUT – PromptSmart actually uses voice recognition technology. In other words, instead of auto scrolling at a preset speed – it listens to you and the words on the screen flow with you. If you get off script for a few moments, it simply pauses and then picks right back up when you return. Incredible!
They went through a major revision about a year ago and since then, it has worked flawlessly. HOWEVER – I still always print my manuscript and have it on the pulpit available should something go terribly wrong. I pay the subscription ($2-3/mo) because it is so worth it and to make sure they keep continuing to develop and improve.
Thanks for the great work you’re doing, Brandon!
I just downloaded PromptSmart after I read this. Wow! I’ve hit a few minor glitches, but the ability for it to use voice recognition to scroll for you is a game-changer. I’m going to be playing with this one a lot more. Thanks for the recommendation, Rodney!
I use my iPad to control Keynote. I put my notes within the keynote slide deck.
Mike Hughes, D.Min., Th.D., Ph.D.
Cool. Do you use Keynote to put your slides on the screen then too?